
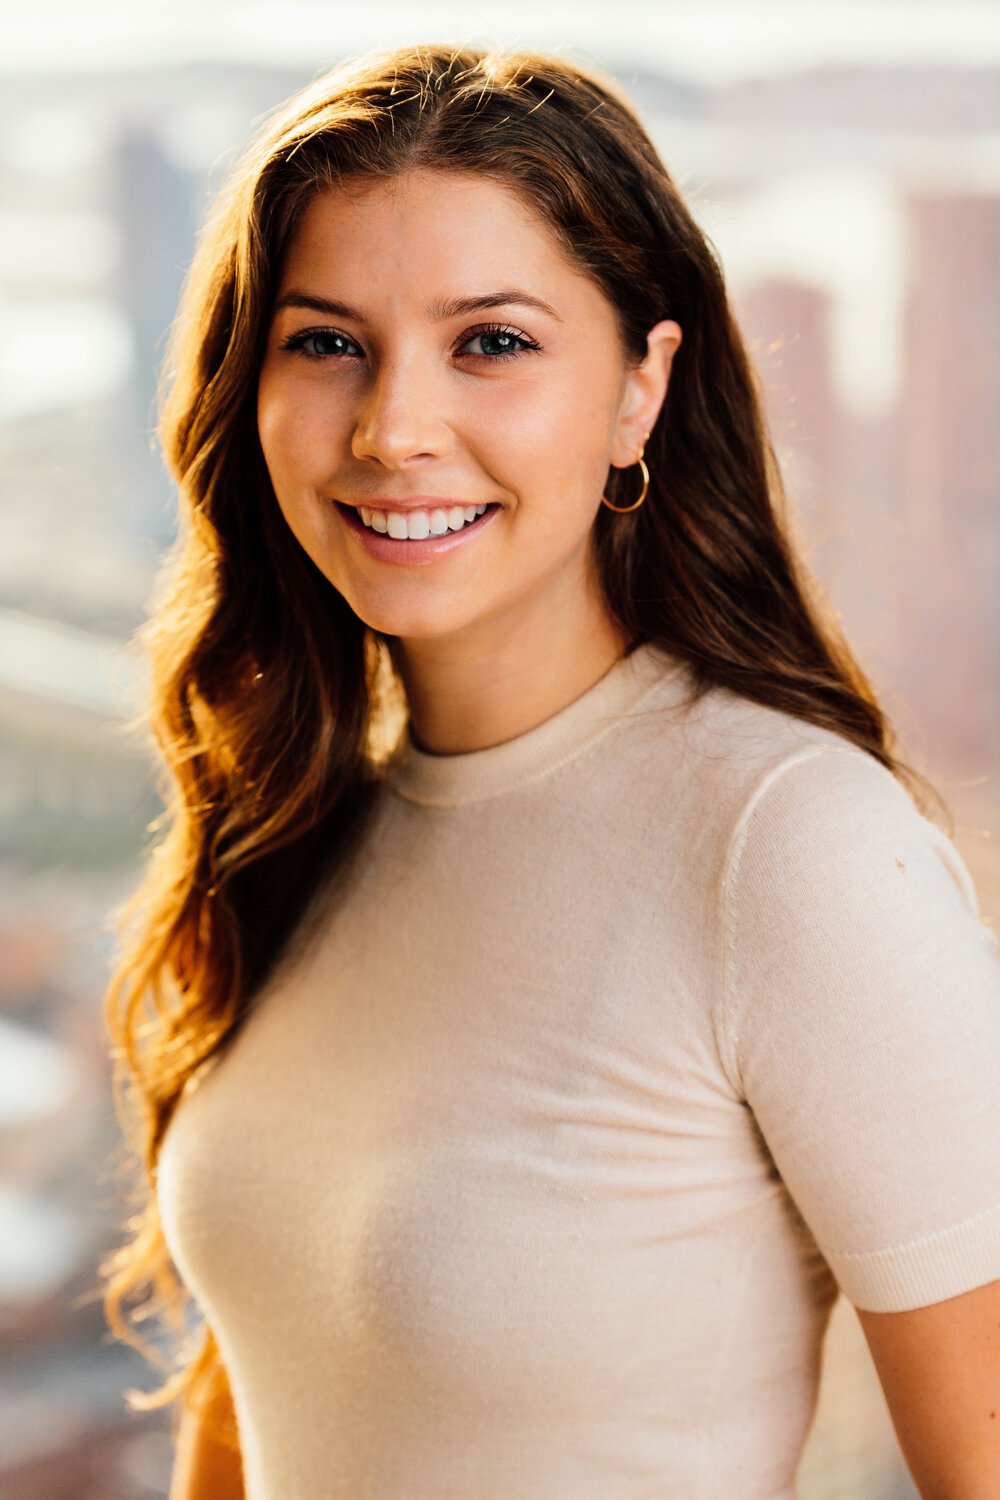
Articulating poses and prompts to models in headshot, portrait, and lifestyle photography for advertising is an essential practice. This is especially true for photographing people who are not models, and if you have a limited amount of time.
It’s an essential practice not because you need prompts and model direction to take a great headshot or portrait, but because model direction helps make the subject trust you. It communicates that you have a vision in mind. It illustrates that you see and care about the details.
Your subject will feel comfortable in front of the camera, confident, supported, and the direction is conducive to capturing organic moments that go beyond just the specific prompts you give them.
When you say “be natural”, “be organic”, “just be yourself”, or many like it, that some photographers revert to: these are not helpful. They’re vague and may often make those inexperienced in front of the camera feel insecure or self-conscious as they’ll scramble for an action or expression to appease you.
Being specific about what you want is an important starting point for a well-executed headshot session with images that don’t appear static. Moreover, communicating the why behind the direction you give leads to achieving shared goals.
Building comfort ahead of the shoot
Before getting into the specific model direction that you can articulate to portrait subjects, the most important aspect of getting an organic and natural-looking portrait, like personal branding photography, is what comes before the photoshoot.
In her book “At Work”, the photographer Annie Leibovitz wrote that for her famous portrait subjects of celebrities, she schedules a two-day shoot: the first day, her camera is not even out or around. It is purely relationship-building with her subject, spending time getting to know them on a personal level for a day. The second day is when the shooting begins, and the camera is out, with shooting time sometimes being less than 20 minutes in total. She also says she’s never told someone to smile for a photo. Leibovitz lets the organic comfort and chemistry create a stunning, often vulnerable, and telling portrait opportunity.
For most photographers who aren’t shooting Queen Elizabeth II like Annie Leibovitz has, scheduling a two-day session isn’t always feasible. Even Leibovitz has expressed that conflict as she ventured further into her career, constrained by time. That said, making time to speak with clients directly beforehand will change the course of your shoot.

Email and written communication alone do not count; if you’re shooting with a paid client, it often doesn’t let them feel heard. You do not want to go into a shoot with misaligned expectations or learn what they want on the fly.
Hearing each other’s voices, building that comfortability, telling clients or your subject WHY you’re getting on a call in the first place: these are core components in making your job easier as a photographer when shooting, builds trust, and the most likely to ensure your client is satisfied with the photos.
If you’re uncomfortable getting on calls, you’re not alone. Many photographers consider themselves introverted. Your subjects will be too. Being a photographer who’s enthusiastic about offering a call and energetic about leading it will make you stand out in a professional setting. The way to overcome those hesitations is to:
Have a prepared agenda to share at the start of the call (this prevents your call from getting sidetracked)
Have your questions written down, leaving them open-ended (not just “yes” or “no”)
Make time for chatting about non-photoshoot-related things. Get to know them!
Ensure time for their questions
Wrap up your call with clear next steps
Meeting with models, subjects, and clients ahead of shooting – whether on a phone call, Zoom call, coffee, or beer- opens up the opportunity to discuss their goals above all. Even if you’re working with a commercial client, they themselves won’t be in front of the camera.
Some questions to ask to build these mutual goals are:
Tell me more about why you reached out for a shoot. Why now?
What do you want these images to achieve? What’s the end goal?
Have you worked with a photographer at all in the past?
If so, what did you like about your shoot? Were there things your photographer did that you liked that you’d want to see again?
On the other hand, was there anything that you didn’t like and wouldn’t want to see from a photographer again?
Where will the photos be used? Who will be seeing them?
What are some of the characteristics of the photos of yourself that you’ve liked in the past?
If they’re struggling, ask, were you smiling? Showing teeth?
This question can lead to asking if they may have any insecurities they’re working to overcome or rather avoid
Ask the hard questions at the start, so you’re not making up for mistakes or misaligned expectations in the end. Many people who may not often have professional photoshoots done will not shoot again for many years to come; consider yourself a steward of how they see themselves for years to come.
Whatever you do, do not just copy and paste those questions into an email to your subject. You can give them an idea of the kinds of questions you’ll be asking on a call, but you’ll never get the same thoughtful answers as you would speaking directly. Mainly because you will not be able to read their body language, hear their hesitations, or their enthusiasm.
Be a consultant leading a photoshoot consultation and understand the different hats you’ll need to wear to achieve stunning results.
Help them feel prepared
Answer your client’s questions before they happen. When it comes to what to wear and how they should prepare for a headshot or portrait photography session, I wrote this guide that covers everything about wardrobe choices and colour theory to make the planning process a breeze.
Build a mutually shared vision
Once you’ve taken time to build comfort on a call with your model, the next step is to visualise what you’re mutually looking to achieve.

For more experienced photographers, and for those who may charge a higher price point, clients may often say “You’re the professional” and leave you to demonstrate what you think is best. If you’ve been asked or told that in the past, that means you’re already well on your way to building trust. Take the lead in the conversation and share what you think will be best, but the expectation setting to come is crucial for a happy model or client.
If your client knows exactly what they want, perfect. This means you’re able to create a clear set of objectives and shots to capture, which you can weigh the shoot’s success. Ask them to make you a shot list if they’ve got a clear picture of what they want, but always leave room to share your own perspective and add to that list.
The further in your career you get, the more clients will say they trust you and want you to take the lead. While it takes two to tango (as in, their input is always required for shots they’re confident with), for my dating photography and personal branding, I share my 70+ lifestyle photography poses, prompts, and ideas.
What I ask of all my clients, regardless of their experience or how thought-out their objectives are, is for them to share inspiration photos or a mood board that they like the look of.
This can be a Pinterest board, a list of Instagram links, screenshots, a PowerPoint, as many or as few photos as they’d like – from my own portfolio or photos they find on the web. If it is for a business, I ask if they have competitor businesses that they feel did it well. Pictures speak a thousand words and illustrate to you what looks good in their eyes. This lets you get on the same page and share clear visual expectations between both parties on the look we’re hoping to achieve.
Make sure to ask if they have preferences on space above, below, and to the sides of their head, for instance, do they prefer vertical or landscape: some businesses may have clear guidelines they’re hoping to follow – but may not articulate those until you ask.
Posing and prompts during a portrait and headshot session
Once you’ve done your mutual homework and you and your model know what the outcomes of the shoot should be, you’re now ready to put your director hat on.
While Annie Leibovitz says she’ll never ask someone to smile for a photo, if you’re trying to capture a headshot or an inviting portrait, getting an organic smile may often be the requirement. If you’re a professional headshot photographer and taking many people’s photos in an office, you may only have a limited amount of time to get that one great shot.
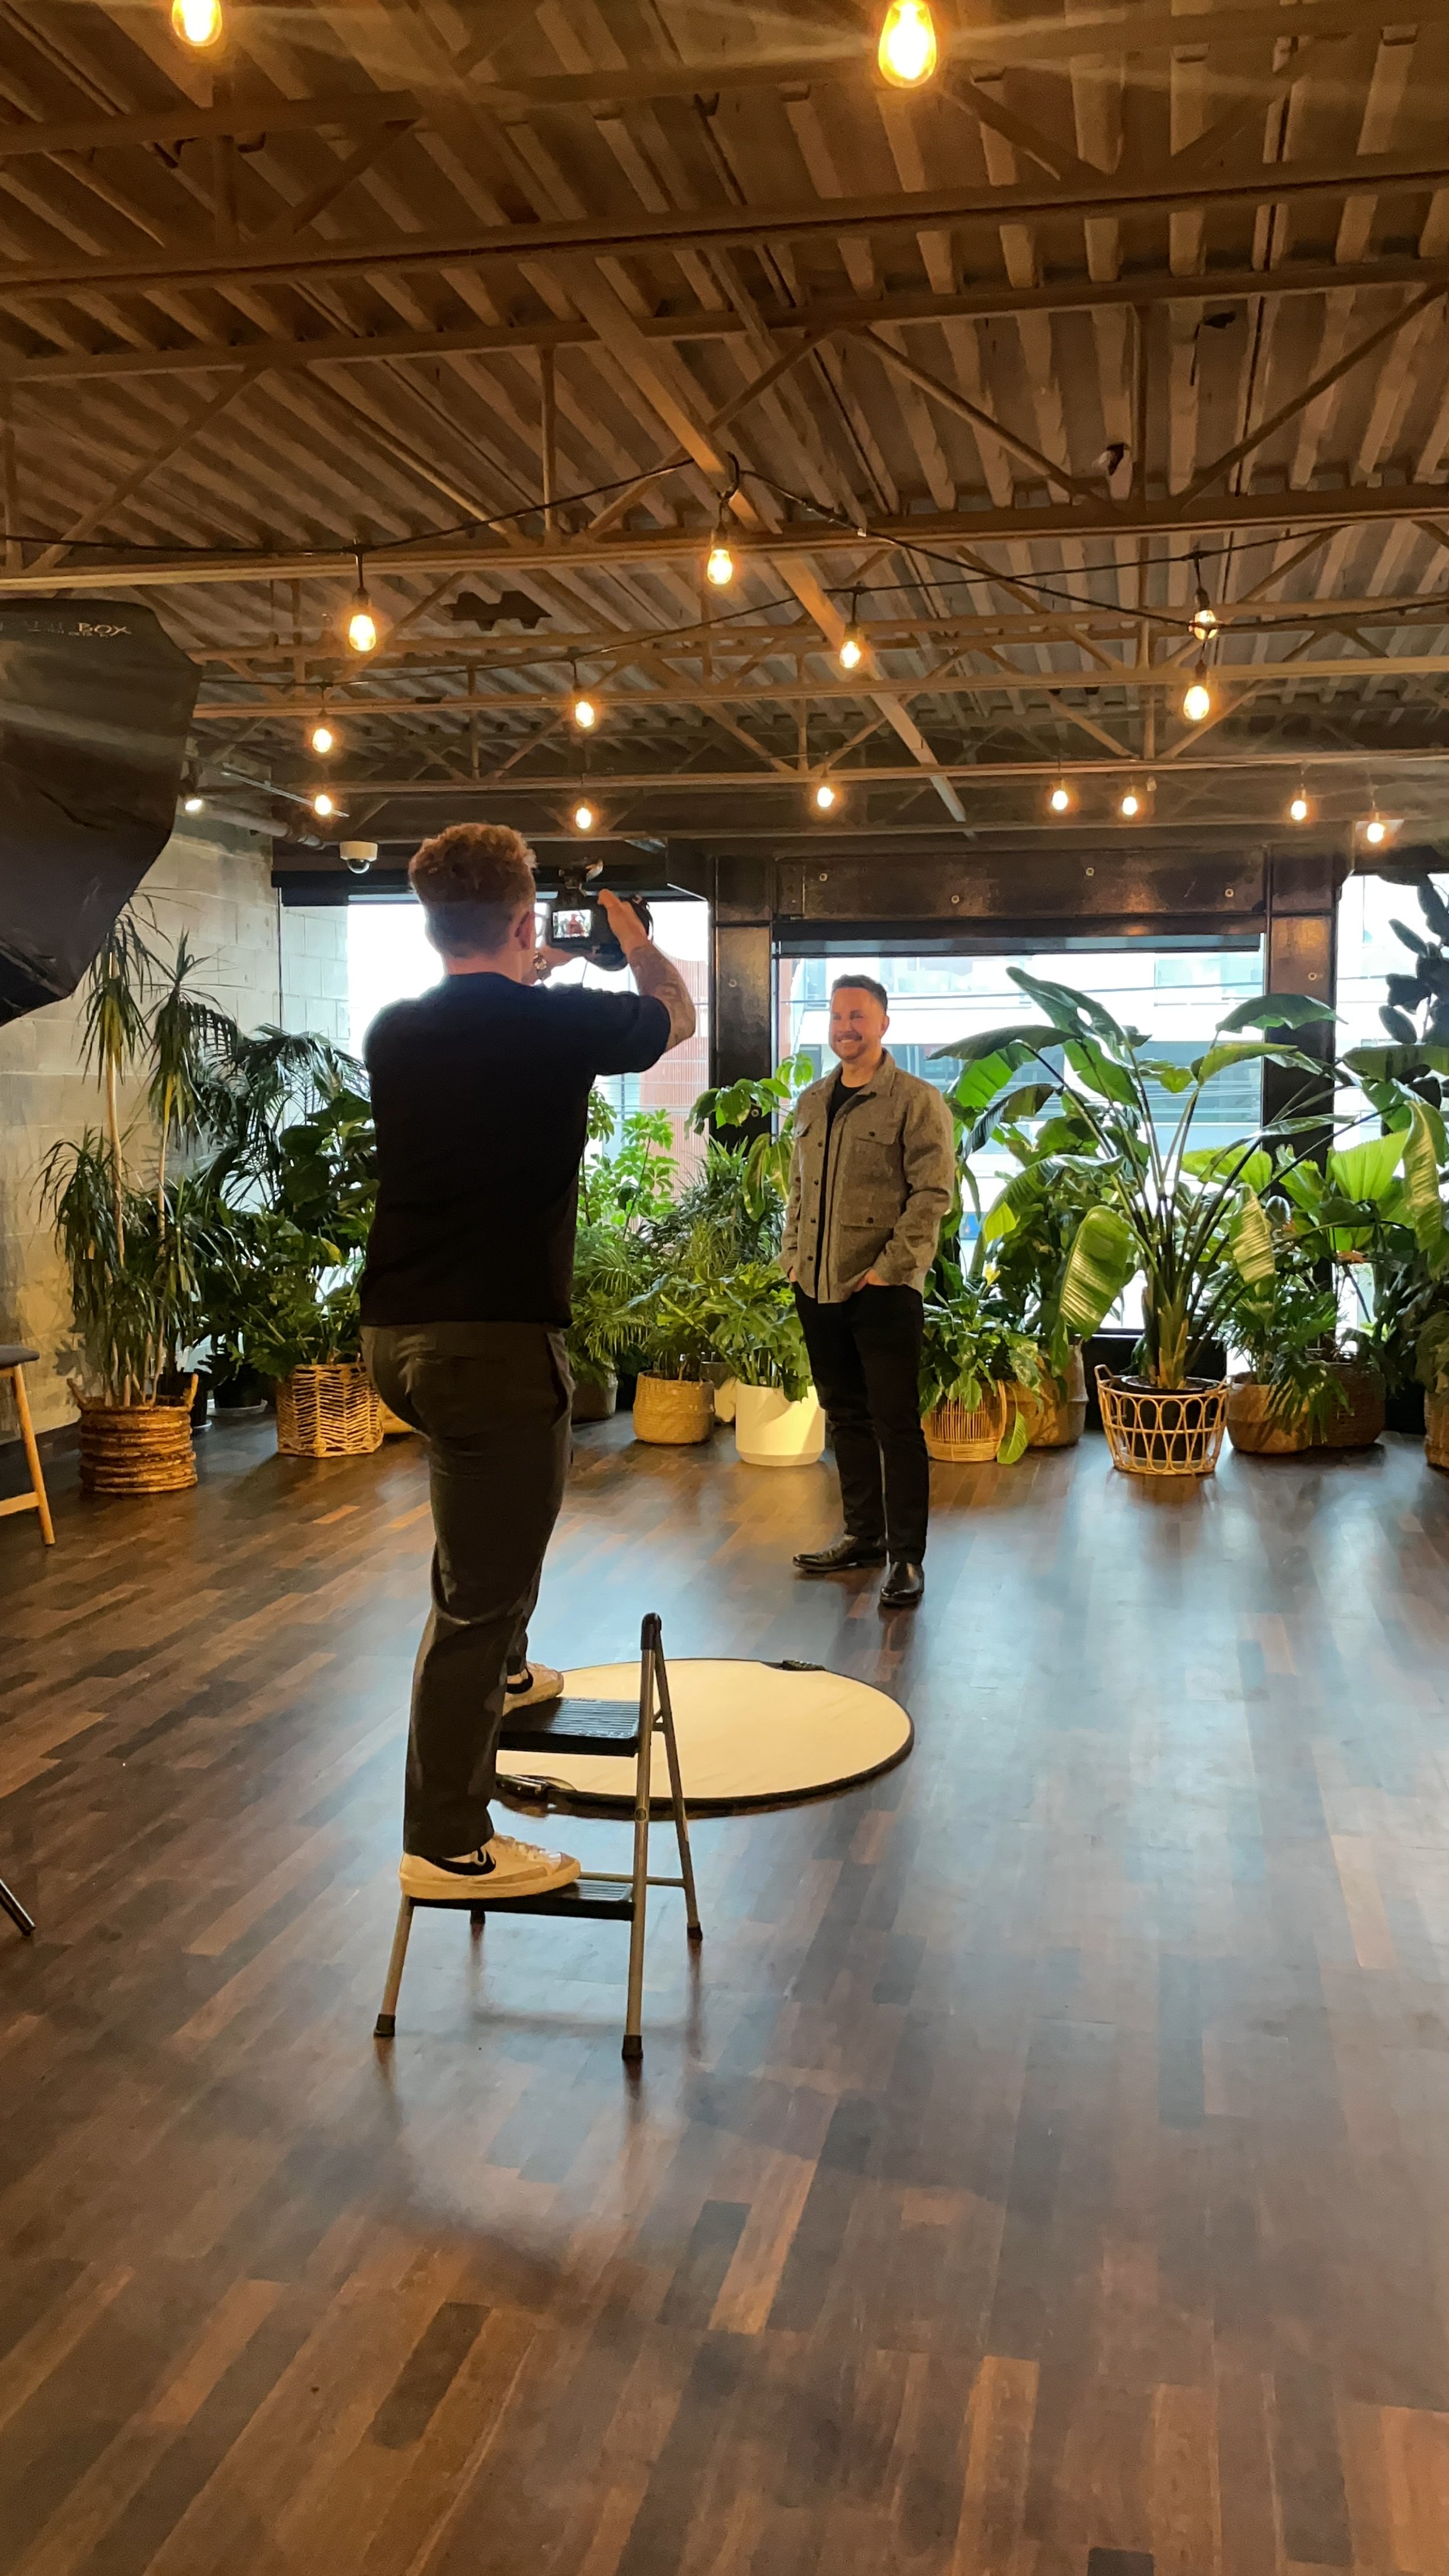
Here’s how I set up my clients who aren’t models for a traditional headshot or portrait with limited time. This is done with the model standing in order to have the most present and inviting body language. These steps are an easy formula to follow, especially if you only have a limited amount of time with someone or if they’re new to getting their photo taken and need very specific direction.

1. Position them at a slight angle.
I ask if they have a preference for a good side. If none, people’s left side is often their best. I find that an angle is more flattering than straight-on, but sometimes, for more masculine photos, straight-on fits best. An angle highlights their jawline and cheekbones while creating a slimmer look.
If you have time, shoot the left side, right side, straight on, show them the photos, then proceed with what they like the best.
“Wherever your toes point, the rest of your body will follow”. This is what I tell my clients to make angling easier.
2. Lead off with one foot
I tell subjects to step slightly further forward with the one foot closest to the camera (toes still pointing in the same direction). This relaxes their posture and slightly angles their shoulder line towards you – more than if they were standing shoulder width apart.
3. Create space between the arms and body
To answer the question “What do I do with my hands?”, create space between the arms and body as a guiding principle, especially for feminine figures. This is the most flattering because it shows your subject’s torso silhouette.
Arms pressed against a body’s sides increase the width of your model’s silhouette, and they may find it unflattering. Creating space makes a slimmer look, especially when combined with a slight angle. You can tell your subjects to twist from their core.
Other ways you can achieve space is by putting hands in pockets (with a slight space between the arms and body), which is great for guys, hands behind the back, and one hand on the hip for women (great for those who are heavier set). This, combined with an angle shot creates a flattering silhouette. If cropped in close, hands in the back pocket also create space.
These rules aren’t absolutes: for a more powerful stature, arms crossed and create a great for some people and break this rule. Leave yourself time to explore each option and get your client’s feedback. There’s nothing wrong with following a formula of left, right, and centre angles with a few of these arm positioning techniques each.
4. Be conscious of your camera’s angle in relation to their eyes
A “bug’s eye angle” (looking up) adds power to your subject and can be more traditionally masculine, but increasing size may be unflattering to some (and may highlight an extra chin). Same with “bird’s eye” (looking down), which can make your subject look smaller and helps hide size. Be mindful of the look you’re trying to create, and whether your subject desires looking slimmer or larger. If in doubt, shoot just slightly above their eyes.
If you’re short (like me), I always have a fold-up stool in the trunk of my car that I bring out for every shoot. Not only does it give me complete control of the angle with any subject, but it is an easy marker for me to remember where I should be standing.
5. Call out their posture
Imagine they’ve got the lumbar support from an office chair pressing into their lower back. Standing shoulders back, then relaxed (not tense and high up, avoid having their trapezius muscles activated).
If they’re tall, you can get them to lean into the camera from their ankles – keeping their back and body straight. It will feel like they’re pushing off slightly on their back foot. This lowers their shoulders slightly to the camera and brings out a great jawline and raises the chin slightly.
To communicate this to clients, I call it the “Michael Jackson lean” as he does in Thriller: all from the ankles forward, towards the camera. Only slightly though! Keep the back and body straight. It’s going to feel weird, but it works – and you may crack a smile from your client in doing so.

6. Keep both shoulders in the frame, where possible
Ensuring the sides of both shoulders are visible, with as much room as possible around them (while not shooting too low on their torso), furthers the concept of creating space: this time, on the outside of your subject. It highlights a slimmer and more flattering silhouette.
If you bring your camera close and cut off their shoulders, the eyes seeing the image do not see where their shoulders end. For some, this may make them appear larger than if their shoulders were visible.
This is not something you can always avoid: acting or actor headshots are more than often shot without shoulders visible, as highlighting just their face close up is the core objective. For more flattering portraits outside of a use case like this, shoulders in the frame add dimension, depth, allowing you to frame your subject’s face with their shoulders (adding symmetry) and complement their figure.
IMPORTANT TIP: If you’re shooting with both shoulders in the frame, but it requires you to get far too much of their lower torso in, and its distracting or not flattering, turn your subject at a harder angle. This decreases the width between their two shoulders, and it enables you to step closer and centre their face better.
To avoid distracting torsos for headshots, shoot above the belt line or even the belly button line at a minimum.
7. Turn their face towards you, align their head’s axis, and bring down the chin
Bring their chin ever so slightly down to accentuate their jawline and cheekbones. A chin too high widens the face and has the opposite, negative effect on the jaws and cheeks.

8. Start with their eyes tightly shut, then count from three for them to open into an expression
This has been by far the most important lesson I’ve learned for capturing a flattering, natural-looking headshot or portrait in a short amount of time.
I tell my clients, “I understand it’s hard just staring at me and smiling the entire time. To make things easier and get a more natural look – this might feel weird – but, …” and I then describe this technique.
Why does it work so well? More often than not, you may catch your subject organically laughing and smiling when they open up. Because it is weird, and it is important to call out that fact. You can’t pretend it isn’t weird (or serious). This works well in stiff, formal offices for those who are new to modelling and not sure how to smile.
Giving them a moment of rest in between smiles and expressions lets their face rest and recharges their look. A smile that lingers too long slowly droops and looks fake.
I repeat this technique over and over, and my clients who aren’t models have often been the happiest with the photos and smiles shot with this. They’ve told me they use it with their friends or when others have their photos taken too. This has purely been my own subjective observations from years of professional photography, but this truly does work.
IMPORTANT TIP: If I find a subject opens their eyes too wide or too little each time, or if it flat out just looks weird and they’re too conscious of their expression when they open up, what I do instead is I tell them to look at their feet. I count them down and then they look up at me with that same expression. This is a different way to achieve the same result.
For longer shoots, I mix in different variations of this (like looking away, down, then right at me) to vary up their shooting experience. You can even have them open up and make their expression when looking away from the camera, too, for more organic-looking lifestyle photography.
9. Smile behind the camera
This last step has come subconsciously to me when shooting, and I never realised it until clients shared it with me. I guess my own face manifests what I’m hoping to see: an organic smile.
If you’re smiling and happy, they will be too. The energy you give off is contagious. If they see your smile when they open up their eyes, they’ll be far more inclined to give you the same smile back.
Shooting headshots isn’t a science experiment: it’s relationship building between two people to capture a comfortable, natural moment. Emulating the expression yourself builds that mutual trust.
These are the nine steps I follow when capturing professional headshots in a time-constrained setting. For more creative shoots, like getting personal branding photos for entrepreneurs, that enable you to work within a unique environment or capture a unique perspective, mix, match, and omit these different steps.

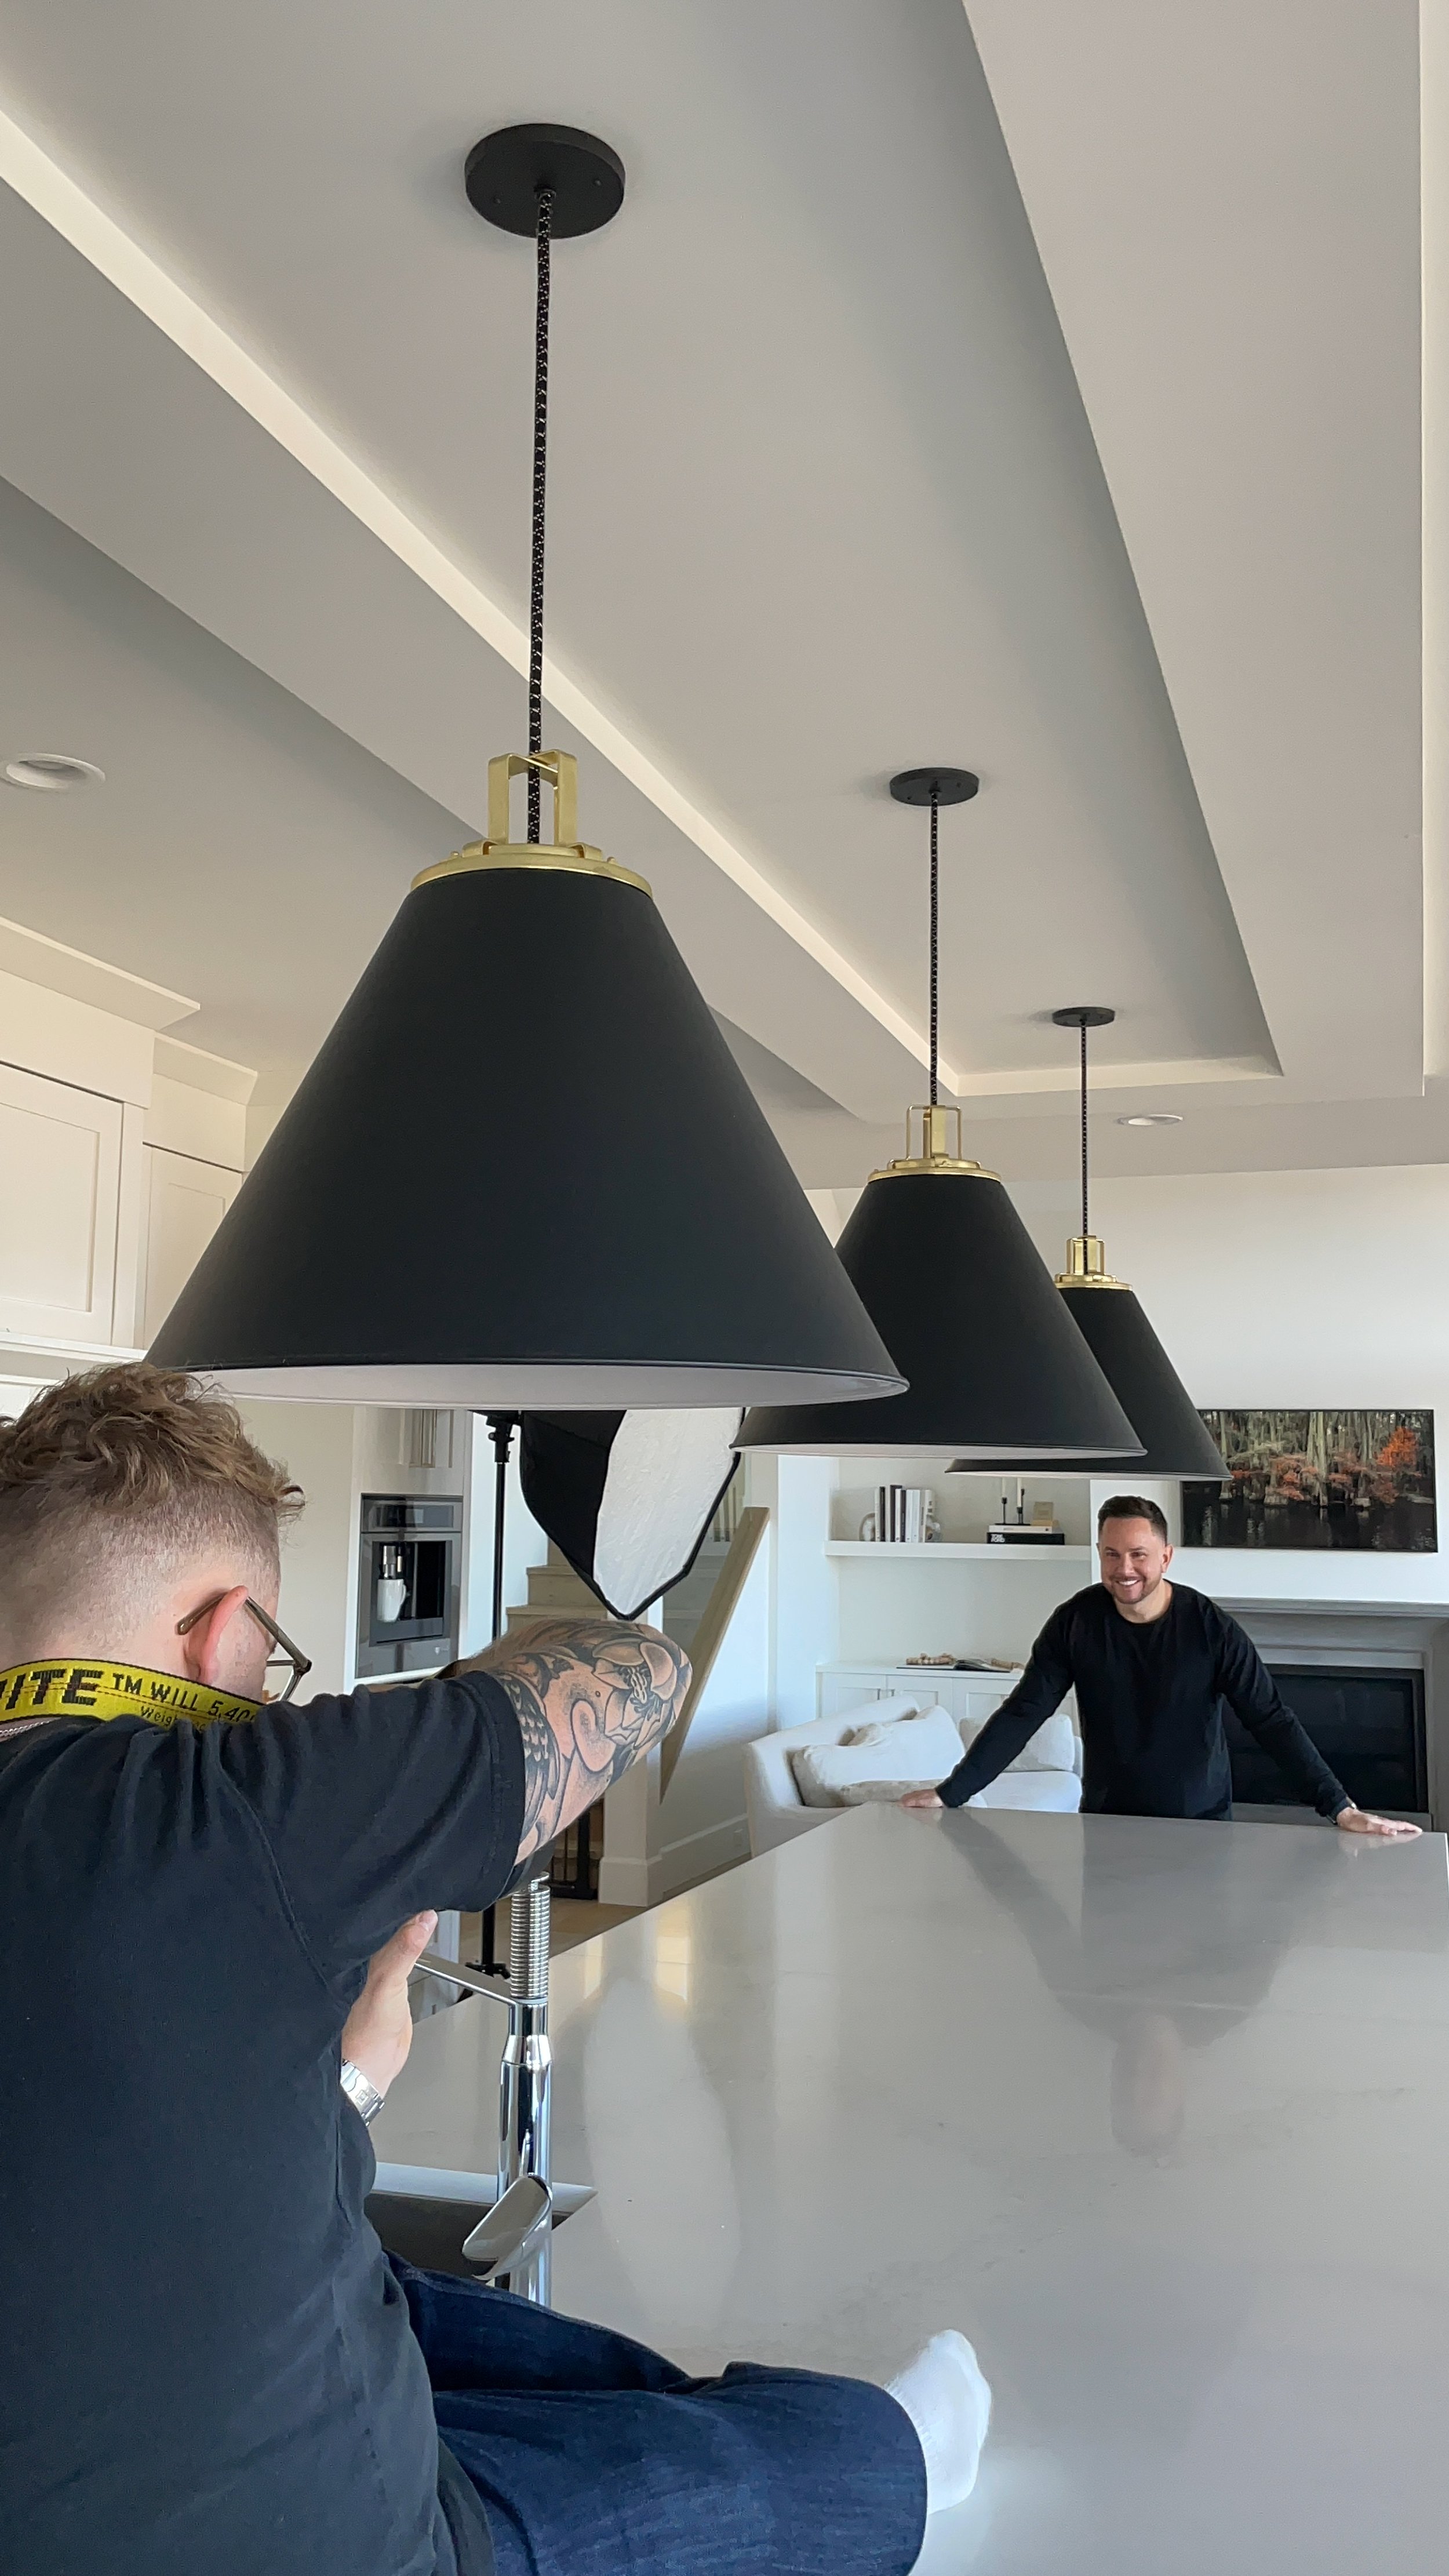
Going beyond headshots
These techniques apply beyond just the static poses of headshot photography. As mentioned, personal branding photography extends from headshots as a way to tell a story with photos. Personal branding is the art of telling a story to elevate presence with portraits in a relatable and approachable way.
Dating profile photography, working almost always with non-models, takes the comfort required for effective photos to the next level. It’s all about creating a relaxed atmosphere and images that don’t make the intended audience wonder why the photo was taken. All of these methods apply, and there’s a silent majority of singles looking for photos when they may have exited a relationship with no recent solo images.
If you’re wondering what lifestyle photography is, how the art of posing non-models is connected, and where it’s applied in the commercial space, I encourage you to read this article if you find this approach rewarding.
Show your model the photos as you shoot
For much of my career, I was worried about showing photos as we go because they weren’t edited yet, they aren’t the final result, and if they saw something they wanted to change and I didn’t know how, what would I do?
If concerns around lighting are what prevent you from doing this (whether over-exposed or under-exposed), check out my article: how and why to use an off-camera softbox flash in photography. This is ideal for capturing consistent and professional headshots, without ever being limited by lighting conditions and location.

If you’re shooting with a newer camera, your manufacturer likely has an app that enables you to seamlessly feed, in real time, all the photos you’re shooting to your device.
I shoot with a Canon R5. For my shoots, I use the Canon app to have a live feed of what I’m shooting visible at all times. I use this on my iPhone when outdoors, and a laptop indoors (using CaptureOne instead). The Canon app is free, however, and a good entry point for tethering.
You’re also able to tether your camera to a laptop if shooting in an indoor, studio setting. I use CaptureOne on a laptop and an extra-long USB-C cord to have a live feed appear in real-time with edits applied. You can use other programs to achieve this, like PhotoMechanic and Lightroom, though they can perform inconsistently.
Using a separate device (versus the back of the camera) will elevate your subject’s shooting experience and make it easy for them to share feedback.
What I was always worried about when showing someone photos while shooting was the silence. Do they like them? What do they think? How are they feeling? Did I mess something up?
The way to overcome the anxiety is to ask the question: “What would you change about these photos?”
This open-ended question makes it easy for them to point out things they may be insecure about and creates a set opportunity to share t
Conclusion
These guiding principles, techniques, and steps are great to keep in your back pocket when taking portraits and headshots of people who aren’t models and are new to being in front of the camera. Rather than short tactics, these approaches explain the why behind what you’re communicating to your model and make it easier to align their expectations with the vision you have in mind.

Build comfort by chatting before shooting. Get to know your subject.
Have a shared visual you’re looking to mutually create. Ask for their inspiration photos of what looks good to them!
Shooting with your subject at an angle can be more flattering and slimming
Stepping the foot closest to the camera forward will lean their shoulders into the camera
Shoot slightly above their eye line and keep their chin slightly down, with an aligned head axis
Create space between the arms and body for a flattering silhouette
Keep both of their shoulders in the frame where possible. If you’re getting too much torso, turn them on a harder angle
Get them to close their eyes as hard as they can, then open up on the count of three into an expression
Your energy and expression is contagious. Smile too!
Always show your clients the photos so there aren’t any surprises when delivering the final shots
If you’ve found these tips helpful, please consider following my work on Instagram and joining my email newsletter for more artistic work and photographer resources to come.